


Home | Applications | Rental Calendar
Rental Calendar
Rental Calendar is to manage rental DVDs, CDs and books from library.
Very simple to save title, season, category and return date.
Everything is so simple to manage with the calendar!
Rental Calendar will automatically remind you a day before the return date.
*Rental Calendar does not sync with Google Calendar.
You can save, send and retrieve your data via "Gmail" and "Google Drive" by using "Export Cloud" function! Please check the description below how to do or click Here.
Rental Calendar Howto Guide
 Modifications
Menu Buttons
❶ "Setting": Set the starting week of the calendar etc…
❷ Copy to SD card": Copy the data to internal and external SD card.
❸ "Password": Set the password.
❹ "Recovery": Use this function when you want to return to the previous data. *Please note that the current data will be deleted when you use this function.
❺ "Backup":
 Import SD card: Import data from SD card.
Export SD card: Export data to SD card.
Export Cloud:You can backup data to Google Drive and Dropbox.*Please install either software from the market.
❻ "Exit":Exit from the Rental Calendar.
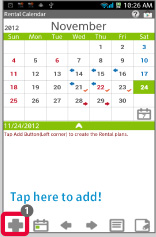
- The opening screen is the calendar.
 Tap +button (Add button) of the calendar.
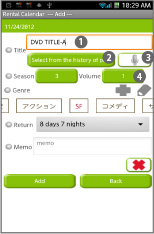
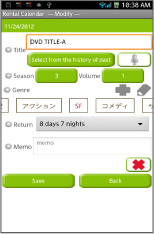
- Enter the title of DVD, CD or book.
 Select the title from the history.
 Save the title with voice input.
 Input the number of the season and volume.
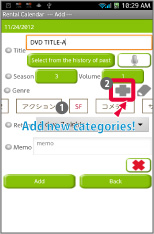
- Default categories are displayed in a row.
- Add a new category, tap +button (Add button), tap pencil button to edit.
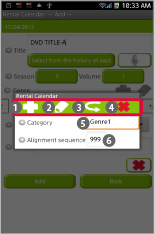
- Add Category Window
- Save a new category.
- Change the name and save.
- Return to Add Window.
- Delete the category.
 Enter the name of the new category.
 Enter the sort. Save 999 to add it at the end.
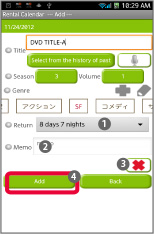
- Select the return date.
- Save a memo.
- Delete the content.
- Tap "Add" and return to the calendar.
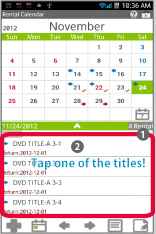
- You can confirm saved data below the calendar.
- Tap one of the title from the list.
- Move to Edit Window. You can change the contents.
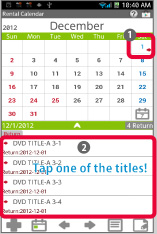
- When returning DVDs, CDs or books, tap the return date from the calendar.
- Tap one of the title from the list.
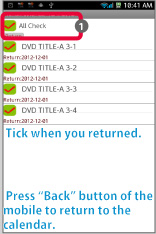
- Move to Checkmark Window.
- Tick the items that you returned.
- Press "Back" button to save and return to the calendar.
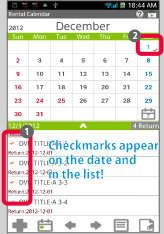
- You can confirm the checkmarks in the list of the calendar.
- You can confirm the checkmarks on the date of the calendar, too.
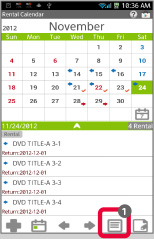
- Tap "List" button.
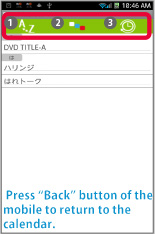
- "AtoZ": Display the list by the alphabet.
- "Category": Display the list by category.
- "Date": Display the list by date.
- Press "Back" button to return to the calendar.
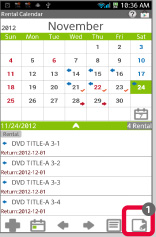
- Tap "Note" button.
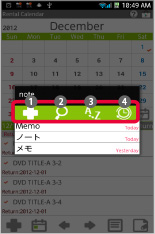
- "Add": Tap to add a new memo. Move to Entry Window. Input the memo then press "Back" button to save and return to the calendar.
- "Search": Search the memo with keywords.。
- "AtoZ": Display the list by the alphabet.
- "Date": Display the list by date.
- Press "Back" button to return to the calendar.

- Swith the list to a full screen.
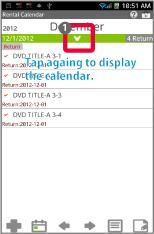
- Tap again to display the calendar.
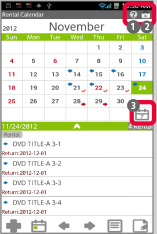
- "Help": Move to the description page of GalleryApp website.
- "Market": Recommendation of other apps of GalleryApp.
- "Weekly": Swith the calendar to weekly display.
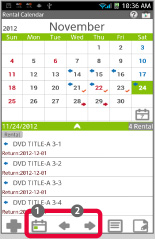
- "Today": Go back to today's date.
- "Left" and "Right": Move the date right and left.
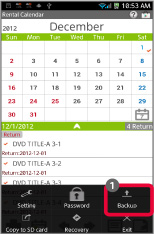
- Tap 「Menu」button of the mobile then select 「Backup」.
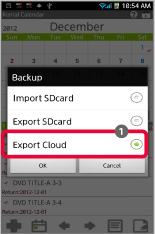
- From「Backup」, select「Export Cloud」.
- Export Cloud is to backup data to Google Drive or Dropbox. Please download and install either software from Google Play.
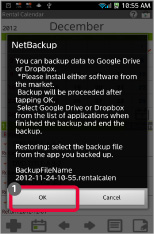
- After installing the software, go back to this page then tap "OK".
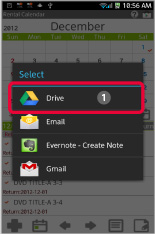
- Select an app from the list to backup. Select here Google Drive as a sample. Select Gmail when you want to send the data by email.
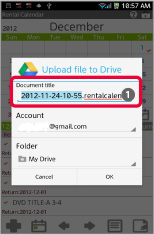
- The file name appears here.
- Tap "OK" to proceed.
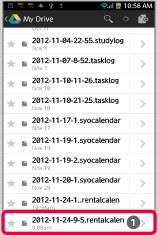
- After uploading, launch Google Drive and select the file name.
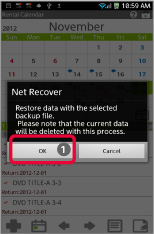
- Tap "OK" to proceed the restoration.
 Click the link below to download Rental Calendar from your mobile.(To download Rental Calendar, open our website with your mobile and tap the right link.) Rental Calendar Rental Calendar Free
Click QR cord below. The link to the Android market will be sent your mobile.Tap the QR cord if you visit our website with your mobile.
 Rental Calendar
 Rental Calendar Free